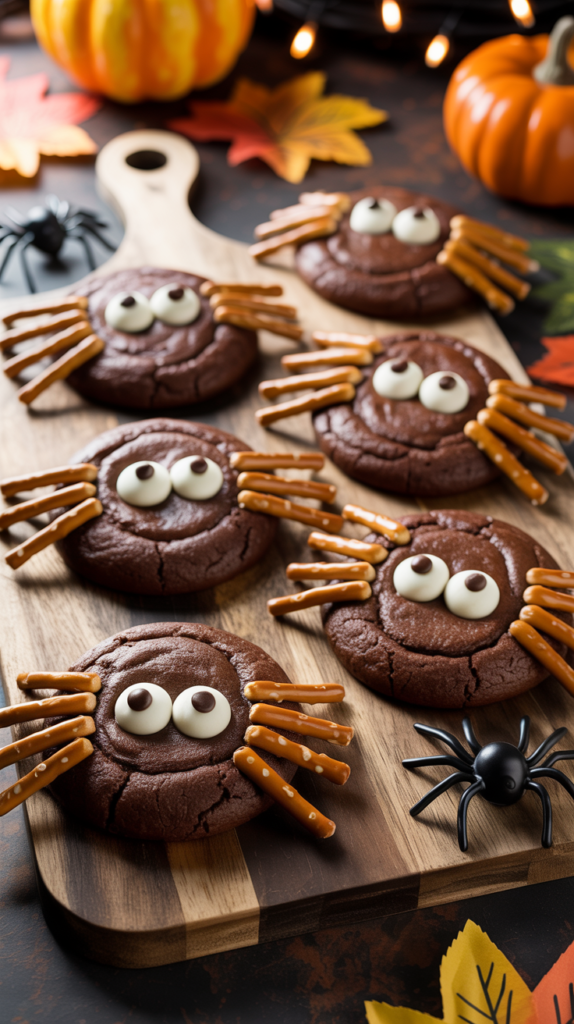
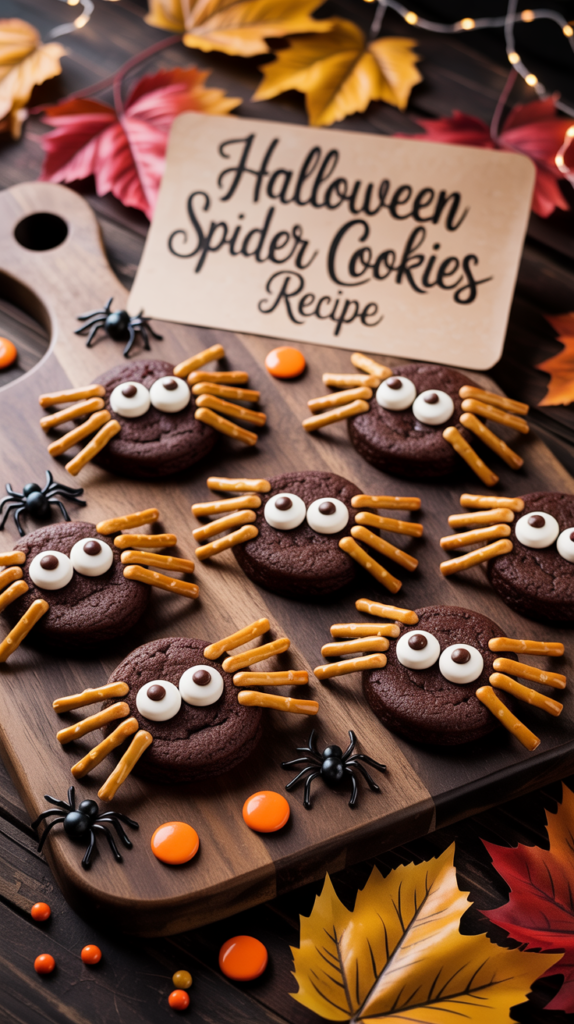
Cute Chocolate Spider Cookies for Halloween
The Spooktacular Treat That’s Easier Than You Think!
What If the Cutest Halloween Treat Was Also the Easiest to Make?
Have you ever looked at those adorable Halloween cookies online and thought, “No way I can pull that off”? What if we told you that the cutest, creepiest, most crowd-pleasing Halloween Cookies are actually super simple—and ready in under an hour? No fancy piping, no hard-to-find ingredients, just chocolatey goodness shaped like friendly little spiders that’ll have kids (and adults!) grinning from ear to ear.
If you’ve been avoiding baking this Halloween because you think it’s too time-consuming or complicated, think again. These Cute Chocolate Spider Cookies are here to prove that festive, fun, and delicious can all happen in one easy recipe.
Why You’ll Love These Halloween Cookies
These aren’t just any Halloween Cookies—they’re the perfect mix of playful, tasty, and stress-free. Here’s what makes them special:
- Ready in under 45 minutes (including baking and cooling!)
- Only 7 main ingredients—most of which you probably already have
- No fancy tools needed—just a baking sheet and your hands
- Kid-friendly to make—great for little helpers in the kitchen
- Naturally portion-controlled—each spider is a single serving
- Made with real cocoa—packed with antioxidants and rich chocolate flavor
Difficulty Level: Beginner
Prep Time: 15 minutes
Bake Time: 10–12 minutes
Total Time: ~40 minutes (plus 10 minutes to cool)
Whether you’re hosting a Halloween party, sending treats to school, or just want a fun weekend activity with your kids, these spider cookies are a no-fail win.
Table of Contents
Table of Contents
Ingredients You’ll Need
This recipe makes about 18–20 spider cookies. All ingredients are pantry staples!
For the Cookie Base:
- 1 cup (2 sticks) unsalted butter, softened
- ¾ cup granulated sugar
- ¾ cup packed brown sugar
- 2 large eggs
- 1 teaspoon vanilla extract
- 2 cups all-purpose flour
- ½ cup unsweetened cocoa powder
- 1 teaspoon baking soda
- ½ teaspoon salt
For the Spider Decorations:
- 1 (12-oz) bag semi-sweet chocolate chips (or melting wafers)
- 1 (4-oz) bag white chocolate chips (for eyes)
- Optional: edible candy eyes (for extra ease and cuteness!)
Tip: Use high-quality cocoa powder—it makes a big difference in flavor and color!
Step-by-Step Instructions
Follow these easy steps for perfectly soft, chewy, and chocolatey Halloween Cookies.
Step 1: Preheat & Prep
- Preheat your oven to 350°F (175°C).
- Line two baking sheets with parchment paper or silicone mats. (This keeps cookies from sticking and makes cleanup a breeze!)
Step 2: Cream the Butter and Sugars
- In a large bowl, beat the softened butter, granulated sugar, and brown sugar together until light and fluffy (about 2–3 minutes with a hand mixer).
- Pro Tip: Make sure your butter is truly softened—not melted! It should dent when you press it with your finger.
Step 3: Add Wet Ingredients
- Beat in the eggs, one at a time.
- Mix in the vanilla extract until combined.
Step 4: Mix in Dry Ingredients
- In a separate bowl, whisk together the flour, cocoa powder, baking soda, and salt.
- Gradually add the dry mix to the wet ingredients, stirring just until no flour streaks remain. Don’t overmix—this keeps cookies tender!
Step 5: Scoop & Shape
- Use a cookie scoop or tablespoon to portion out dough into 1½-inch balls.
- Place them 2 inches apart on your baking sheets—they’ll spread a little as they bake.
Step 6: Bake to Perfection
- Bake for 10–12 minutes. The edges should look set, but the centers will still look soft—that’s okay! They’ll firm up as they cool.
- Let cookies cool on the baking sheet for 5 minutes, then transfer to a wire rack to cool completely before decorating.
Why this matters: Cooling completely ensures the melted chocolate sticks and doesn’t slide right off!
Assembly: Turning Cookies into Spiders!
Now for the fun part—making your Halloween Cookies look like cute (not scary!) spiders.
Step 1: Melt the Chocolate
- Place semi-sweet chocolate chips in a microwave-safe bowl.
- Microwave in 30-second bursts, stirring between each, until smooth and glossy. (Or use a double boiler on the stove.)
- Tip: Add 1 teaspoon of coconut oil to the chocolate for extra shine and easier piping!
Step 2: Create Spider Legs
- Dip a fork into the melted chocolate.
- Gently drag 4 lines outward from one side of a cooled cookie—these are the front legs.
- Repeat on the opposite side for the back legs (8 legs total!).
- Work quickly before the chocolate sets.
Step 3: Add the Eyes
- Option A: Use a toothpick to dot two small white chocolate eyes. Let them set, then add tiny black dots with melted dark chocolate.
- Option B (easiest!): Press two edible candy eyes onto the top of each cookie.
- Presentation Tip: Arrange cookies on a platter with fake spiderwebs (cotton candy or piped white icing) for a spooky display!
These little guys look like they’re crawling right off the plate—perfect for Halloween parties or treat bags!
More Desserts Recipes You’ll Love!
. Blueberry Brownies Recipe
. Easy M&M Cookie Bars Recipe
. German Chocolate Poke Cake Easy
. No Bake Pumpkin Pie : Creamy Dreamy Pumpkin Perfection

Storage and Make-Ahead Tips
Want to prep ahead? These Halloween Cookies are great for planning!
- Unbaked dough: Scoop into balls and freeze on a tray. Once solid, store in a freezer bag for up to 3 months. Bake straight from frozen—just add 1–2 extra minutes.
- Baked (undecorated) cookies: Keep in an airtight container at room temperature for up to 5 days.
- Fully decorated cookies: Store in a single layer (or with parchment between layers) for up to 4 days. Avoid refrigerating—they can get soggy!
- Reheating? Not needed! These are best enjoyed at room temperature. But if they feel dry, a 10-second zap in the microwave can soften them slightly.
Bonus: The chocolate decorations harden quickly, so these cookies travel well for school parties or neighbor gifts!
Recipe Variations: Get Creative!
Make these Halloween Cookies your own with fun twists:
Peanut Butter Spider Cookies
Swap ½ cup of flour for ½ cup creamy peanut butter in the dough. The spiders get a nutty twist!
Gluten-Free Version
Use a 1:1 gluten-free flour blend (like Bob’s Red Mill). Everything else stays the same!
Vegan-Friendly
Use plant-based butter, flax eggs (1 tbsp ground flax + 2.5 tbsp water per egg), and dairy-free chocolate chips.
Mini Spider Bites
Roll dough into 1-inch balls for bite-sized spiders—perfect for cookie platters!
Colorful Legs
Use colored candy melts (orange, purple, green) for legs to match your Halloween theme.
Stuffed Spiders
Press a mini marshmallow or caramel square into the center before baking for a gooey surprise!
These variations keep the recipe fresh year after year—and let everyone enjoy them, no matter their diet.
Why These Halloween Cookies Are a Healthy-ish Treat
Let’s be real: Halloween is about fun, not dieting. But that doesn’t mean you can’t sneak in a few better-for-you perks!
- Cocoa powder is rich in antioxidants, which help protect your cells.
- Portion-controlled—each spider is one cookie, so it’s easy to enjoy without overdoing it.
- No artificial colors or flavors (if you skip the candy eyes or choose natural ones).
- Homemade = less sugar than store-bought cookies. You control what goes in!
Plus, baking together as a family encourages mindful eating and creates joyful memories—something no packaged snack can offer.
Final Thoughts: Have Fun & Get Spooky!
Halloween is all about imagination, laughter, and a little harmless spookiness. These Cute Chocolate Spider Cookies bring all of that to your kitchen—with zero stress. They’re simple enough for beginners, fun enough for kids, and impressive enough to wow your guests.
So grab your mixing bowl, put on some Halloween tunes, and let your inner baker shine. Don’t worry about perfection—lopsided legs and wobbly eyes just add to the charm! After all, the best Halloween Cookies aren’t the fanciest… they’re the ones made with love (and maybe a little chocolate on your nose).
Go ahead—make a batch, share them with neighbors, or leave a few out for the “ghosts.” Happy baking, and happy haunting!
FAQs: Your Halloween Cookies Questions, Answered
Q: Can I use store-bought cookie dough instead?
A: Yes! Use a chocolate or devil’s food cookie dough. Bake as directed, cool completely, then decorate as spiders.
Q: How do I prevent the chocolate legs from breaking?
A: Make sure the chocolate isn’t too hot when piping—it should be smooth but not runny. Also, let the legs set fully (about 10 minutes) before moving the cookies.
Q: Are these cookies nut-free?
A: The base recipe is nut-free, but always check your chocolate chip labels—some brands process in facilities with nuts.
Q: Can I make these ahead for a party?
A: Absolutely! Bake and decorate up to 3 days in advance. Store in an airtight container at room temperature.
Q: Do I have to use cocoa powder? Can I use hot chocolate mix?
A: No—hot chocolate mix has sugar and milk powder that will throw off the texture. Stick with unsweetened cocoa powder.
Q: What if my cookies spread too much?
A: Your butter might have been too soft or melted. Next time, chill the dough for 15–20 minutes before baking.
Q: Are there any health benefits to dark chocolate in this recipe?
A: Yes! Dark chocolate (especially 70% or higher) contains flavonoids that support heart health. Feel free to use dark chocolate chips for extra benefits.
Q: Can I freeze decorated cookies?
A: It’s not recommended—the chocolate decorations can “sweat” or crack when thawed. Freeze the baked (undecorated) cookies instead, then decorate after thawing.
Now you’re ready to bake the most adorable, easy, and delicious Halloween Cookies of the season! 🕷️🍫
Grab your ingredients, invite the kids, and let the spider-making begin!
CRAVING MORE RECIPES
. Chicken Buffalo Dip (Crock Pot)
. Old-Fashioned Rhubarb Pie Recipe
. Easy Creamy Cucumber Salad Recipe
. Chocolate Pina Colada Recipe
Did You Try Our Recipe?
There are no reviews yet. Be the first one to write one.