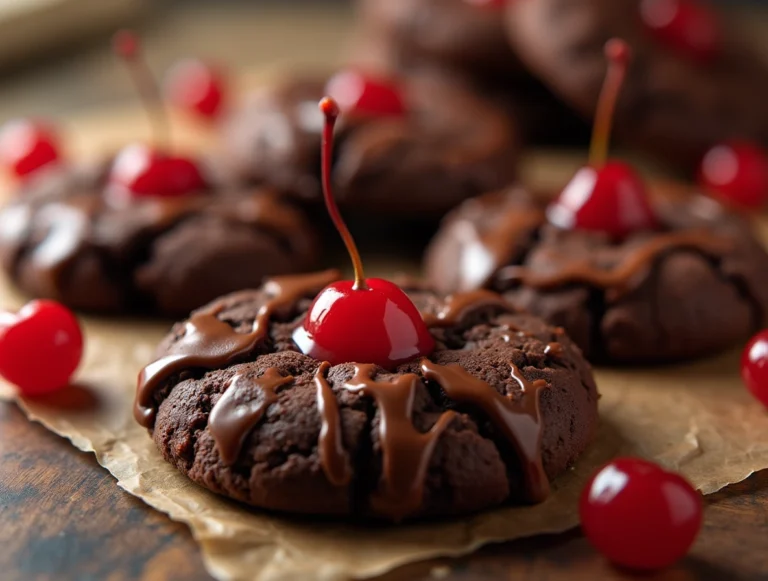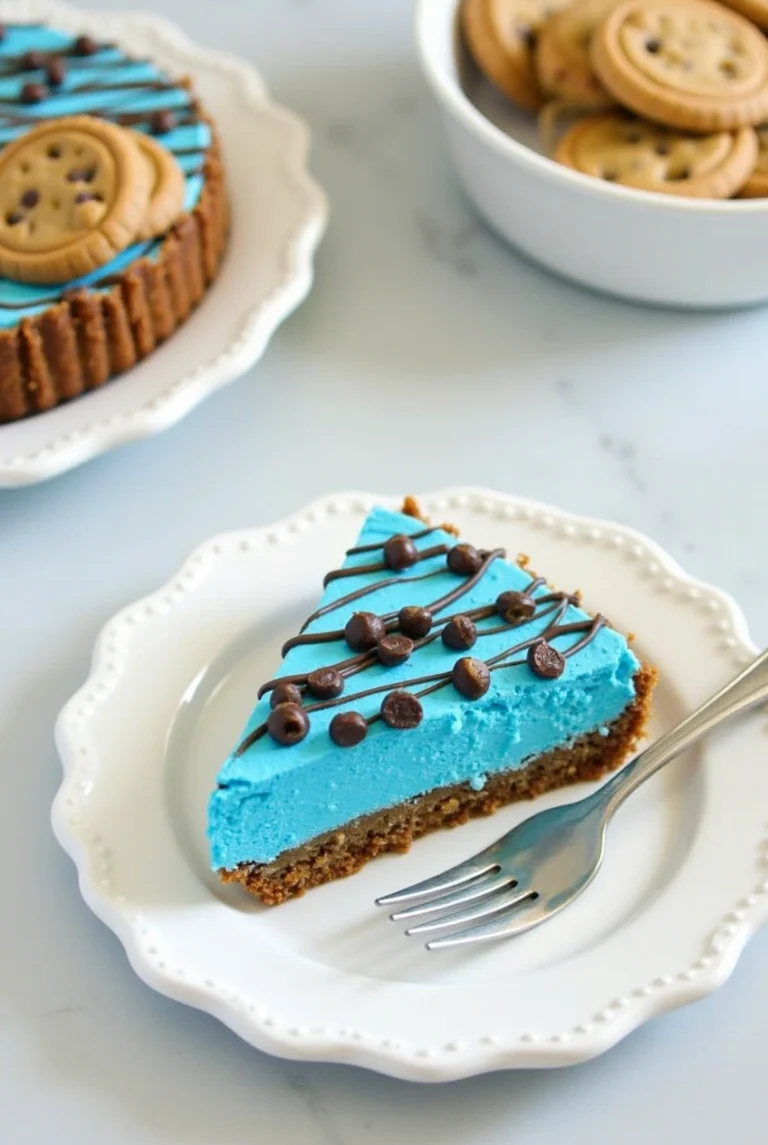
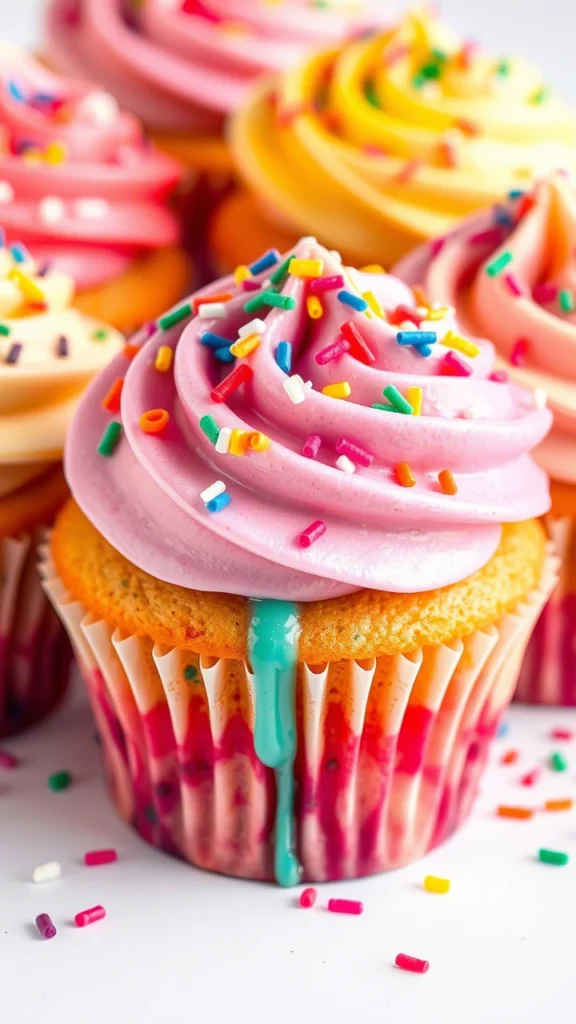
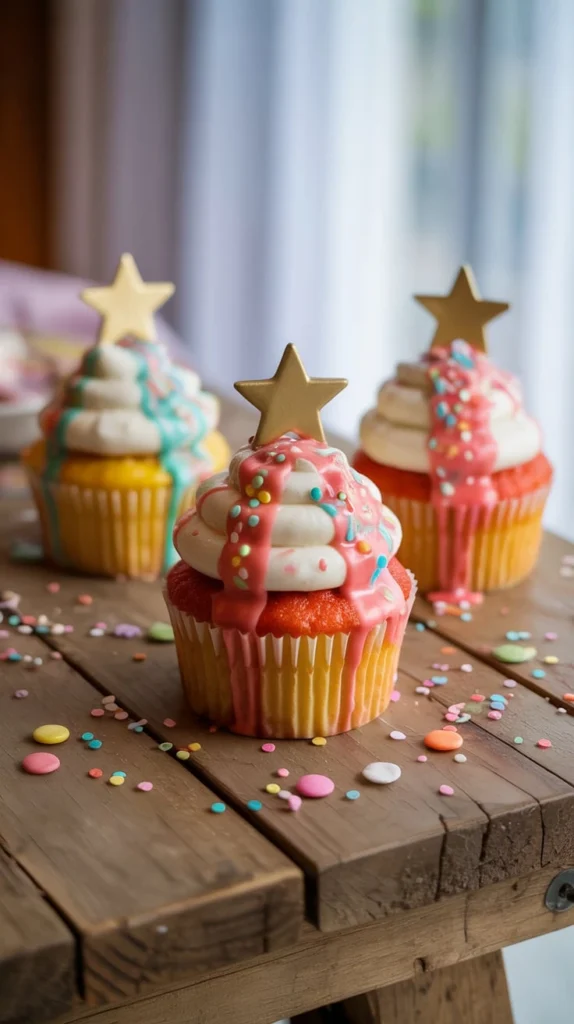
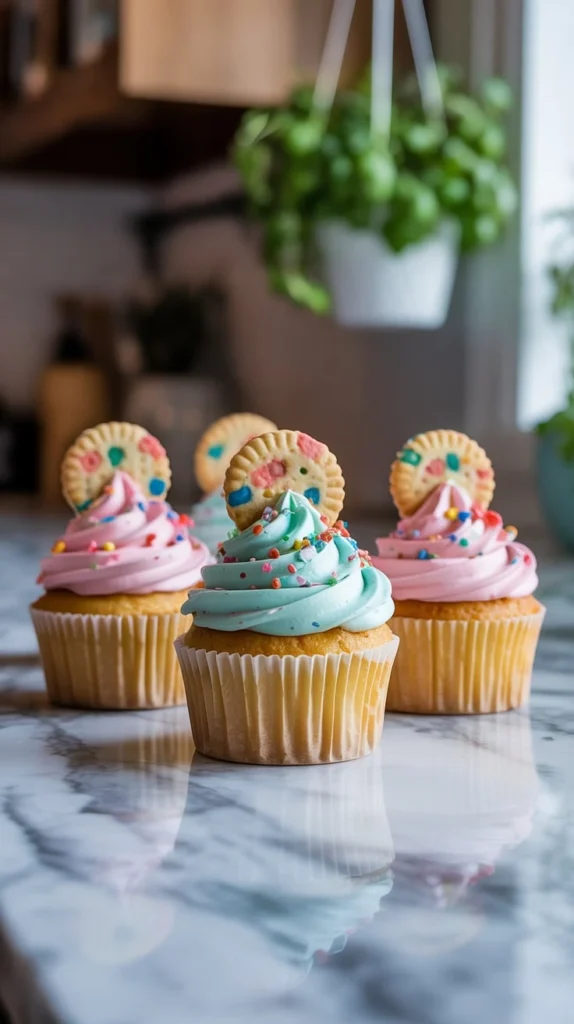
Confetti Cookie Drip Cupcakes
Confetti Cookie Drip Cupcakes: A Magical Treat That’s Easier Than You Think!
Have you ever wondered why bakery cupcakes look so perfect that you almost don’t want to eat them? What if we told you that making stunning, professional-looking cupcakes at home is not only possible but also surprisingly simple? These Confetti Cookie Drip Cupcakes combine the joy of birthday cake with the wow-factor of bakery decoration, and you can make them in your own kitchen!
Why These Cookie Drip Cupcakes Are Special
These aren’t just ordinary cupcakes – they’re a celebration in every bite! The Confetti Cookie Drip Cupcakes feature a soft, buttery vanilla cupcake base topped with colorful cookie crumb “drip” decorations and a sweet vanilla buttercream. What makes them truly special is their show-stopping appearance that looks like it came straight from a fancy bakery.
Time Requirement: Total time is about 2 hours (including cooling time) Difficulty Level: Easy to moderate – perfect for beginner bakers who want impressive results Serving Size: Makes 12 beautiful cupcakes
The best part? Despite their professional appearance, these cupcakes use simple ingredients and straightforward techniques that anyone can master. Plus, they’re incredibly versatile – you can customize the colors, flavors, and toppings to match any celebration!
Table of Contents
Table of Contents
Ingredients You’ll Need
For the Vanilla Cupcakes:
- 2 ½ cups all-purpose flour
- 2 ½ teaspoons baking powder
- ½ teaspoon salt
- 1 ½ cups granulated sugar
- ½ cup unsalted butter, softened
- 2 large eggs
- 2 teaspoons vanilla extract
- 1 ¼ cups whole milk
For the Cookie Drip Topping:
- 1 cup vanilla wafer cookie crumbs (about 20-25 cookies)
- 2 tablespoons granulated sugar
- 2 tablespoons unsalted butter, melted
- 1-2 tablespoons milk
- Food coloring (assorted colors)
For the Vanilla Buttercream:
- 1 cup unsalted butter, softened
- 4 cups powdered sugar
- 2-3 tablespoons heavy cream
- 2 teaspoons vanilla extract
- Pinch of salt
Optional Decorations:
- Rainbow sprinkles
- Edible glitter
- Mini chocolate chips
- Fresh berries
Step-by-Step Instructions
Making the Cupcakes
- Preheat and Prepare: Start by preheating your oven to 350°F (175°C). Line a 12-cup muffin tin with paper liners. This ensures your cupcakes bake evenly and don’t stick.
- Mix Dry Ingredients: In a medium bowl, whisk together the flour, baking powder, and salt. Set this mixture aside – you’ll use it later to create the perfect texture.
- Cream Butter and Sugar: In a large mixing bowl, beat the softened butter and granulated sugar together until light and fluffy. This should take about 3-4 minutes with an electric mixer. The mixture should look pale yellow and airy.
- Add Eggs and Vanilla: Beat in the eggs one at a time, making sure each egg is fully incorporated before adding the next. Add the vanilla extract and mix until combined.
- Alternate Wet and Dry: Gradually add the flour mixture to the butter mixture, alternating with the milk. Begin and end with the flour mixture. Mix until just combined – overmixing can make your cupcakes tough.
- Fill and Bake: Divide the batter evenly among the prepared muffin cups, filling each about ⅔ full. Bake for 18-22 minutes, or until a toothpick inserted in the center comes out clean.
- Cool Completely: Remove cupcakes from the oven and let them cool in the pan for 5 minutes. Then transfer them to a wire rack to cool completely before frosting.
Creating the Cookie Drip Effect
- Make Cookie Crumbs: Place vanilla wafers in a food processor or place them in a sealed bag and crush with a rolling pin until you have fine crumbs.
- Prepare Drip Mixture: In a small bowl, mix the cookie crumbs with melted butter and sugar. Add milk gradually until you achieve a thick, spreadable consistency.
- Add Color: Divide the mixture into small bowls and add different food coloring to each. Mix well until colors are vibrant and even.
- Create the Drip: Spoon the colored cookie mixture into a piping bag or zip-top bag with a small corner cut off. Pipe thin lines down the sides of each cupcake to create the dripping effect.
More Desserts Recipes You’ll Love!
Cookies and Cream Cupcakes Easy
Kool Aid Pie No Bake
Heaven on Earth Cake
No-Bake Peppermint Bark Snowballs
Assembly: Building Your Masterpiece
Frosting the Cupcakes
- Prepare Buttercream: Beat softened butter until creamy, then gradually add powdered sugar. Add vanilla, salt, and cream. Beat until smooth and fluffy.
- Pipe or Spread: Use a piping bag with a star tip for professional-looking swirls, or simply spread the frosting with a knife for a more rustic look.
Adding the Final Touches
- Apply Cookie Drips: While the frosting is still soft, pipe the colored cookie mixture around the edges to create drips. Let gravity do the work – the mixture will naturally flow down the sides.
- Top with Sprinkles: Immediately add rainbow sprinkles or other decorations while the cookie drip is still wet.
- Add Extra Details: Consider adding a small cookie on top, fresh berries, or edible glitter for extra sparkle.
Pro Assembly Tips:
- Work quickly once you start adding decorations
- Keep cookie drip mixture at room temperature for best flow
- Don’t over-decorate – sometimes less is more
- Take photos as you work to remember your favorite combinations
Storage and Make-Ahead Tips
Keeping Your Creations Fresh
Room Temperature Storage: Store unfrosted cupcakes in an airtight container at room temperature for up to 2 days. Keep frosted cupcakes covered for up to 1 day.
Refrigerator Storage: Frosted cupcakes can be stored in the refrigerator for up to 3 days. Let them come to room temperature before serving for best flavor.
Freezing Options: Unfrosted cupcakes freeze beautifully for up to 2 months. Wrap them tightly in plastic wrap and store in freezer bags.
Make-Ahead Strategies
Cupcake Base: Bake cupcakes up to 2 days ahead and store at room temperature wrapped in plastic wrap.
Buttercream: Prepare frosting up to 3 days ahead and store in the refrigerator. Bring to room temperature and re-whip before using.
Cookie Crumb Mixture: Make the cookie drip mixture up to 1 day ahead and store in the refrigerator. Let it soften at room temperature before using.
Complete Assembly: Fully assembled cupcakes are best enjoyed the same day but can be made the night before for next-day celebrations.
Creative Recipe Variations
Flavor Adventures
Chocolate Cookie Drip: Use chocolate cookies instead of vanilla wafers and add cocoa powder to the buttercream for a rich chocolate version.
Lemon Dream: Add lemon zest to the cupcake batter and use lemon extract in the buttercream. Top with yellow cookie drips and lemon curd.
Strawberry Delight: Add strawberry puree to the cupcake batter and use strawberry extract in the frosting. Pink cookie drips complete this sweet combination.
Dietary Modifications
Gluten-Free Version: Substitute gluten-free flour blend for all-purpose flour in the cupcake base.
Dairy-Free Option: Use plant-based butter and milk alternatives throughout the recipe.
Vegan Adaptation: Replace eggs with flax eggs and use vegan butter and milk alternatives.
Presentation Variations
Mini Cupcakes: Use mini muffin tins for bite-sized versions perfect for parties.
Cake Version: Double the recipe and bake in two 8-inch round pans for a stunning drip cake.
Seasonal Themes: Use holiday-themed sprinkles and colors to match any celebration.
Health Benefits and Nutritional Information
While these Confetti Cookie Drip Cupcakes are definitely a treat, they do offer some nutritional benefits:
Calcium: The milk and butter provide calcium for strong bones and teeth.
Protein: Eggs and milk contribute to daily protein needs.
Energy: The carbohydrates provide quick energy for active lifestyles.
Moderation Tips:
- Share cupcakes with friends and family
- Enjoy one cupcake as a special treat rather than multiple servings
- Pair with fresh fruit for added vitamins
- Consider making mini versions for smaller portions
Conclusion: Your Baking Adventure Awaits
Making Confetti Cookie Drip Cupcakes is more than just following a recipe – it’s about creating memories, celebrating special moments, and discovering that you can achieve bakery-quality results at home. The joy of seeing your friends and family’s faces light up when they see these beautiful cupcakes is priceless.
Don’t be afraid to experiment with different colors, flavors, and decorations. Each batch you make will teach you something new and help you develop your own signature style. Remember, even professional bakers started somewhere, and every masterpiece begins with a single cupcake.
Whether you’re baking for a birthday, a holiday celebration, or just because you want to brighten someone’s day, these Cookie Drip Cupcakes are sure to impress. The combination of soft, delicious cupcakes with the fun, colorful drips creates a treat that’s as delightful to look at as it is to eat.
So grab your mixing bowls, preheat that oven, and get ready to create something magical. Your kitchen is about to become a cupcake wonderland where creativity flows as freely as the colorful cookie drips!
Frequently Asked Questions
How far in advance can I make Cookie Drip Cupcakes?
You can make the cupcake base up to 2 days ahead. The complete cupcakes are best enjoyed the same day but can be assembled the night before for next-day events.
Can I make these cupcakes without food coloring?
Absolutely! You can skip the food coloring entirely or use natural alternatives like beet juice for pink, spinach powder for green, or turmeric for yellow.
What’s the best way to store leftover cupcakes?
Store unfrosted cupcakes at room temperature for up to 2 days. Frosted cupcakes keep in the refrigerator for up to 3 days. Bring to room temperature before serving.
Can I freeze these cupcakes?
Yes! Unfrosted cupcakes freeze well for up to 2 months. Wrap tightly in plastic wrap and store in freezer bags. Thaw at room temperature before frosting.
What if my cookie drips don’t flow properly?
If the cookie mixture is too thick, add a little more milk. If it’s too thin, add more cookie crumbs. The mixture should be thick but pourable.
Are these cupcakes suitable for people with allergies?
You can easily adapt this recipe for various dietary needs by using gluten-free flour, dairy-free alternatives, or egg substitutes. Always check ingredient labels for specific allergies.
How can I make the buttercream less sweet?
Reduce the powdered sugar by ½ cup and add an extra 1-2 tablespoons of cream. You can also add a pinch more salt to balance the sweetness.
What’s the secret to perfect cupcake texture?
Don’t overmix the batter, and make sure your butter is properly softened (not melted) when creaming. Also, avoid opening the oven door while baking.
Can I use store-bought frosting instead?
Yes! While homemade buttercream tastes better, store-bought frosting works well for the filling. You’ll still need to make the cookie drip topping yourself.
How do I prevent air bubbles in my buttercream?
Beat the buttercream on medium speed for several minutes to remove air bubbles. If bubbles appear, smooth them out with a spatula before piping.
What’s the best way to transport these cupcakes?
Use a cupcake carrier or place them in individual containers. Transport on a flat surface and avoid sudden stops or turns.
Can I make these cupcakes kid-friendly?
These cupcakes are perfect for kids! Let children help with safe tasks like adding sprinkles or mixing ingredients. They’ll love being part of the baking process.
CRAVING MORE RECIPES
Old-Fashioned Rhubarb Pie Recipe
Pink Lemonade Moscato Recipe
Shrimp And Vegetable Stir-Fry Recipe
Pepper Steak In A Crock Pot
Did You Try Our Recipe?
There are no reviews yet. Be the first one to write one.