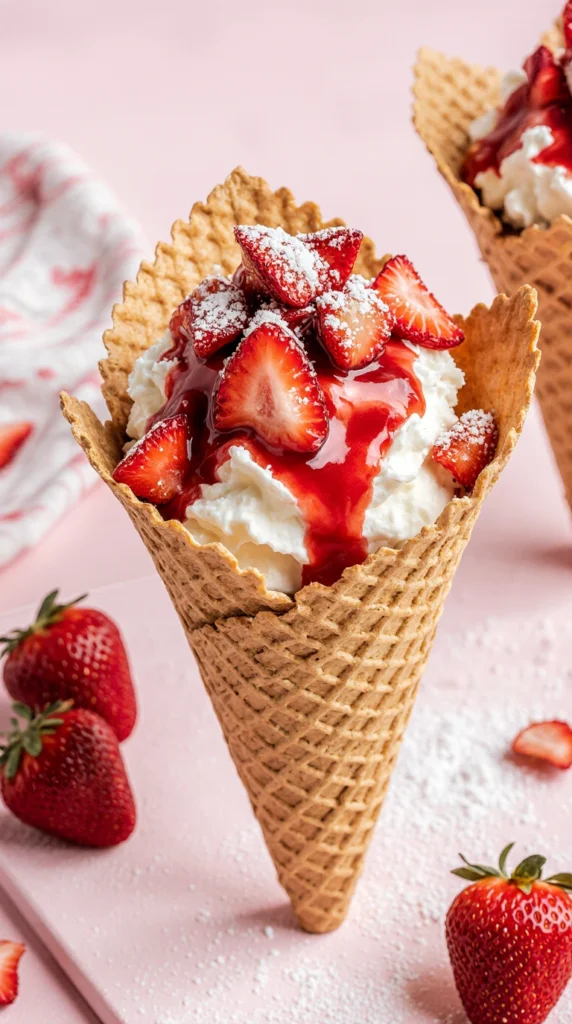
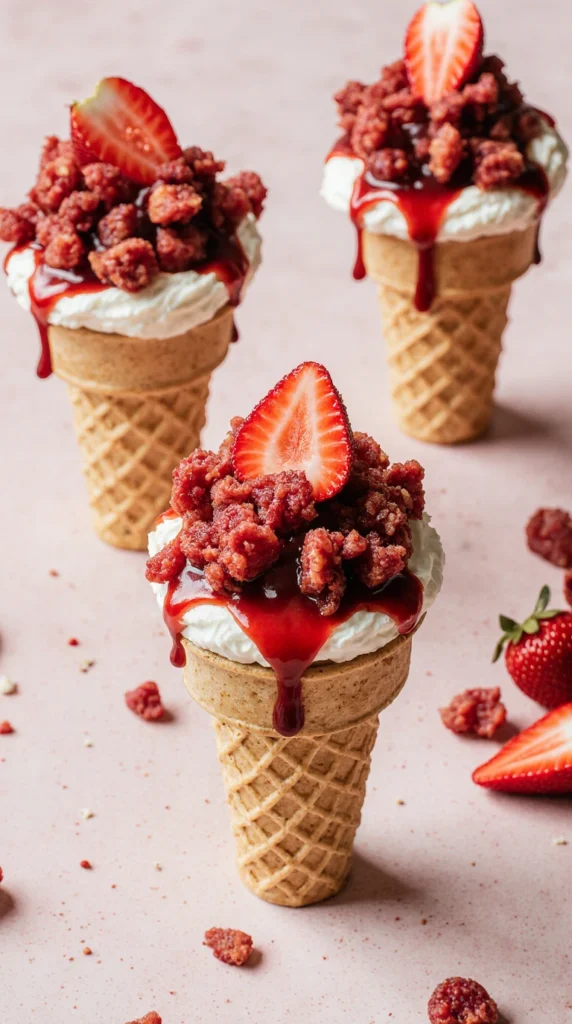
Strawberry Crunch Cheesecake Cones
Could a Dessert in a Cone Be Better Than a Slice of Cheesecake?
Have you ever taken a bite of cheesecake and thought, “This is delicious… but what if it were fun to eat?” What if you could hold it in your hand, crunch into it like a treat from the ice cream truck, and still get that rich, creamy flavor you love?
Believe it or not, you can! Meet the Strawberry Crunch Cheesecake Cones — a dessert that’s not only easy to make but also fun, fresh, and totally Instagram-worthy. These handheld treats combine everything you love about cheesecake with the playful crunch of a cone and the juicy sweetness of strawberries.
And guess what? You don’t need to turn on your oven. No baking required. No fancy tools. Just simple ingredients, a little time, and a whole lot of yum.
Ready to find out how to make a dessert that’s as fun as it is delicious? Let’s dive in!
Overview: Why You’ll Love These Strawberry Crunch Cones
If you’re looking for a dessert that’s easy, no-bake, and perfect for any occasion , these Strawberry Crunch Cheesecake Cones are your new go-to. Whether you’re hosting a birthday party, need a quick after-school snack, or just want to treat yourself, this recipe delivers big flavor in a tiny package.
Here’s what makes them special:
- No oven needed – perfect for hot days or when you don’t want to heat up the kitchen.
- Ready in under 30 minutes (plus chilling time) – great for last-minute cravings.
- Kid-friendly and adult-approved – everyone from 5 to 95 will love them.
- Portable and mess-free – eat them like a cone, no spoon required!
- Packed with real fruit – strawberries add natural sweetness and a boost of vitamin C.
Table of Contents
Table of Contents
Difficulty Level: Super easy (even beginners can do it!)
Prep Time: 20 minutes
Chill Time: 2 hours
Total Time: 2 hours 20 minutes
Servings: 12 cones
Ingredients: What You’ll Need
Let’s gather everything before we start. Here’s your shopping list for making Strawberry Crunch Cones at home.
For the Cone Base:
- 12 waffle ice cream cones (store-bought or homemade)
- 1 cup crushed graham crackers (about 8–10 full sheets)
- 3 tablespoons melted butter
- 1 tablespoon brown sugar (optional, for extra crunch)
For the Cheesecake Filling:
- 8 oz (1 package) cream cheese, softened
- 1/3 cup granulated sugar
- 1 teaspoon vanilla extract
- 1/2 cup heavy cream (or whipped cream from a can)
- 1/4 teaspoon lemon juice (keeps the filling bright and fresh)
For the Strawberry Topping:
- 1 1/2 cups fresh strawberries, hulled and diced
- 2 tablespoons granulated sugar
- 1 teaspoon lemon juice
- 1 teaspoon cornstarch (helps thicken the juices)
Optional Garnishes:
- Whipped cream
- Fresh mint leaves
- Extra strawberry slices
- Sprinkles (for a fun party look)
Step-by-Step Instructions: Let’s Make It!
Ready to get started? Follow these simple steps to create your Strawberry Crunch Cones . Don’t worry — it’s easier than it sounds!
Step 1: Prepare the Strawberry Topping
We’ll start with the strawberries so they have time to cool and thicken.
- In a small saucepan, combine the diced strawberries, sugar, lemon juice, and cornstarch.
- Cook over medium heat, stirring often, for about 5–7 minutes until the strawberries soften and the liquid turns into a thick, jam-like sauce.
- Remove from heat and let it cool completely. You can speed this up by placing it in the fridge.
Tip: Don’t skip the cornstarch! It keeps the filling from making your cone soggy.
Step 2: Make the Crunchy Cone Base
Now, let’s give our cones that extra crunch and flavor.
- In a small bowl, mix the crushed graham crackers, melted butter, and brown sugar (if using).
- Spoon about 1 tablespoon of the mixture into each waffle cone.
- Press it down gently with the back of a spoon to create a firm base.
Tip: Work quickly so the butter doesn’t harden. If it does, warm the mixture slightly.
Step 3: Whip Up the Cheesecake Filling
This is the creamy, dreamy part everyone loves.
- In a large bowl, beat the softened cream cheese until smooth and fluffy (about 1 minute).
- Add the sugar and vanilla extract. Mix until well combined.
- In a separate bowl, whip the heavy cream until soft peaks form (or use canned whipped cream for a shortcut).
- Gently fold the whipped cream into the cream cheese mixture until smooth and light.
Tip: Soften the cream cheese by leaving it on the counter for 30 minutes. Cold cream cheese makes lumpy filling!
Step 4: Chill the Cones (Optional but Helpful)
If your kitchen is warm, pop the cones in the freezer for 10–15 minutes. This helps the filling set faster and prevents melting.
Assembly: Build Your Strawberry Crunch Cones
Now for the fun part — putting it all together! This is where your cones go from good to gourmet.
Step 1: Add the Cheesecake Filling
Using a spoon or a piping bag (if you want it to look fancy), add about 2–3 tablespoons of the cheesecake filling into each cone, right on top of the graham cracker base.
Tip: Don’t overfill! Leave about 1/2 inch at the top for the strawberries.
Step 2: Top with Strawberry Mix
Spoon 1 tablespoon of the cooled strawberry topping over the cheesecake layer.
Tip: Make sure the strawberry mix is completely cool — warm fruit will melt the filling!
Step 3: Garnish and Serve
Now’s your chance to get creative!
- Add a small dollop of whipped cream on top.
- Place a fresh strawberry slice on each cone.
- Sprinkle with colorful sprinkles or a few mint leaves.
Your Strawberry Crunch Cones are now ready to impress!
Storage and Make-Ahead Tips
Want to make these ahead of time? Great idea! These cones store well and are perfect for parties.
How to Store:
- Unfilled cones with base: Store in an airtight container at room temperature for up to 3 days.
- Cheesecake filling: Keep in a sealed container in the fridge for up to 2 days.
- Strawberry topping: Store in a jar in the fridge for up to 5 days.
Make-Ahead Plan:
- Day 1: Make the strawberry topping and store in the fridge. Prepare the graham cracker base and store in a container.
- Day 2: Assemble the cones 2–3 hours before serving. Chill in the fridge until ready to eat.
Can You Freeze Them?
Yes — but carefully!
- Freeze fully assembled cones on a tray for 1 hour, then wrap individually in plastic.
- Eat within 1 month. Let them thaw in the fridge for 15 minutes before serving.
Warning: Waffle cones can get soggy if frozen too long. Best enjoyed fresh or chilled!
Recipe Variations: Mix It Up!
The best part about Strawberry Crunch Cones ? They’re super easy to customize. Try these fun twists:
1. Chocolate Lover’s Version
- Swap graham crackers for crushed chocolate cookies.
- Add a drizzle of chocolate sauce inside the cone before filling.
2. Berry Medley
- Use a mix of strawberries, blueberries, and raspberries.
- Skip the cooking and use fresh berries for a juicier, lighter topping.
3. Low-Sugar Option
- Use sugar-free whipped topping and light cream cheese.
- Sweeten strawberries with honey or maple syrup instead of sugar.
4. Nutty Crunch
- Add chopped pecans or almonds to the graham cracker base.
- Drizzle with peanut butter or almond butter before adding filling.
5. Tropical Twist
- Replace strawberries with diced mango or pineapple.
- Use coconut-flavored waffle cones for extra island vibes.
6. Mini Party Size
- Use small pastry cones or shot glasses for bite-sized treats.
- Perfect for dessert tables or potlucks!
Health Benefits: Yes, Dessert Can Be a Little Healthy!
Wait — dessert with benefits? Yes, really!
While these Strawberry Crunch Cones are undeniably sweet, they include some smart choices:
- Strawberries: Packed with vitamin C, fiber, and antioxidants. They help your immune system and keep your skin glowing!
- Cream cheese: A good source of calcium and protein (in moderation).
- No artificial flavors: You control what goes in — no mystery ingredients!
- Portion-controlled: Each cone is a single serving, so it’s easier to enjoy without overdoing it.
Want it even healthier? Use Greek yogurt instead of cream cheese for extra protein and a tangy flavor.
More Desserts Recipes You’ll Love!
Easy Raspberry Mousse Recipe
Easy Strawberry Tiramisu Recipe
Strawberry Banana Cheesecake Salad Recipe
Strawberry Cupcakes With Straweberry Buttercream
Conclusion: Time to Get Crunchy!
Who knew that one of the best desserts you’ll ever make starts with a simple ice cream cone? These Strawberry Crunch Cheesecake Cones are proof that easy doesn’t mean boring. With their creamy filling, crunchy base, and fruity topping, they’re a full dessert experience in every bite.
They’re perfect for:
- Summer BBQs
- Kids’ birthday parties
- Date night at home
- Or just because you deserve a treat
So go ahead — grab some cones, slice up those strawberries, and let your inner dessert artist shine. Whether you stick to the original recipe or try a wild variation, one thing’s for sure: you’re going to love every crunchy, creamy, sweet bite.
And don’t forget to share your creations! Snap a photo, tag a friend, and spread the joy of Strawberry Crunch Cones .
Now, who’s ready to make dessert fun again?
FAQs: Your Questions, Answered
Here are answers to the most common questions about making Strawberry Crunch Cones .
1. Can I make these without cream cheese?
Yes, but the flavor will change. Try using mascarpone, Greek yogurt, or even vegan cream cheese for a dairy-free option.
2. How do I stop the cones from getting soggy?
- Make sure the strawberry topping is completely cool before adding.
- Use fresh, dry waffle cones.
- Assemble no more than 2–3 hours before serving, or freeze briefly.
3. Can I use frozen strawberries?
Yes, but thaw and drain them first. Frozen berries release more water, so you may need extra cornstarch to thicken the sauce.
4. Are these cones kid-friendly to make?
Absolutely! Kids love helping with crushing graham crackers, spooning fillings, and decorating. It’s a fun kitchen activity.
5. Can I make them dairy-free?
Yes! Use dairy-free cream cheese, coconut cream (chilled overnight), and vegan butter. Choose dairy-free waffle cones, too.
6. How long do they last in the fridge?
Up to 2 days. After that, the cone may soften. For best texture, enjoy within 24 hours.
7. Can I use store-bought whipped cream?
Definitely! A can of whipped topping works great and saves time. Just fold it gently into the cream cheese.
8. What size cones should I use?
Standard-sized waffle cones (about 4–5 inches tall) work best. Mini cones are great for parties!
9. Can I prep these for a party?
Yes! Prepare all components ahead of time and assemble 1–2 hours before guests arrive. Keep them chilled until serving.
10. Are Strawberry Crunch Cones gluten-free?
They can be! Use gluten-free waffle cones and swap graham crackers for gluten-free cookies or crushed nuts.
Final Tip: Have Fun With It!
Desserts shouldn’t be stressful. If your cone cracks, if the filling spills, if the strawberries aren’t perfectly sliced — it’s okay! The best part of making Strawberry Crunch Cones isn’t perfection. It’s the joy of creating something sweet, sharing it with people you love, and taking a big, crunchy bite of happiness.
So go ahead. Make a mess. Laugh. Lick your fingers. And enjoy every second of your delicious creation.
Now, what are you waiting for? Grab your ingredients and make your first batch of Strawberry Crunch Cones today!
CRAVING MORE RECIPES
German Marble Cake Recipe
Creamy Herb Salmon Bliss Recipe
Chicken Rice Soup
Cookies And Cream Frappuccino Recipe
Did You Try Our Recipe?
There are no reviews yet. Be the first one to write one.